Weaving its way along a mountain range that divides the prefectures of Nagano and Niigata, the Shinetsu Trail offers hikers a scenic combination of ridge walks and forest trails. Despite being a relatively short long-distance trail, the humid Japanese summer and the sometimes quirky Japanese hiking customs can pose a challenge for foreign hikers. That’s why I felt it was time for a Practical Guide to the Shinetsu Trail!
Directly go to section:
- The Preparation:
– Level of difficulty
– Logistics (transport, accommodation, etc.)
– Food and supplies - The Gear
- The Route
– Campsites on the Shinetsu Trail - The Cost
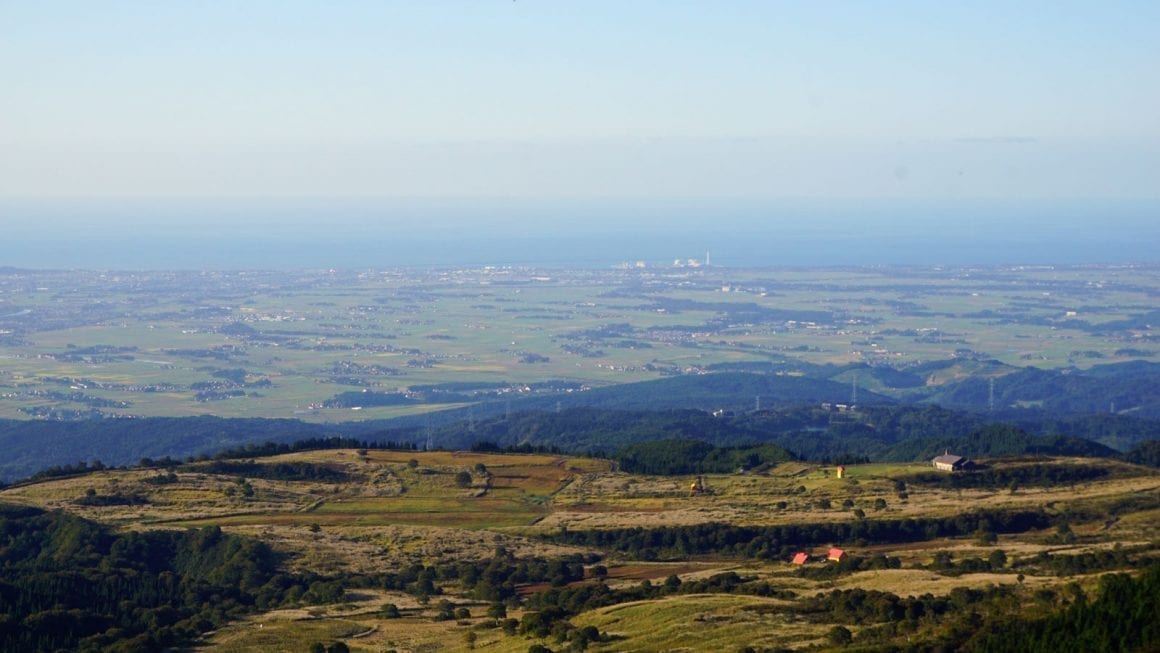
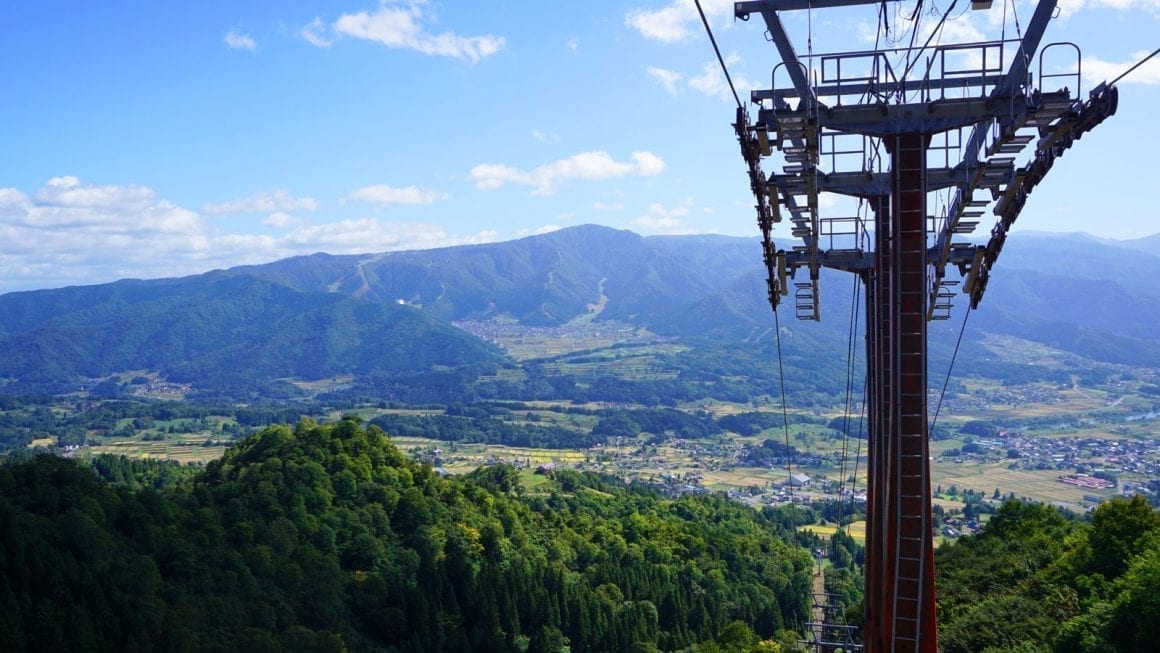
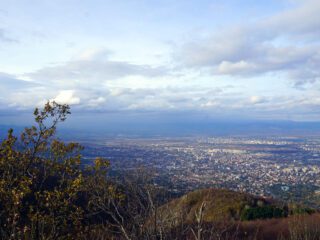
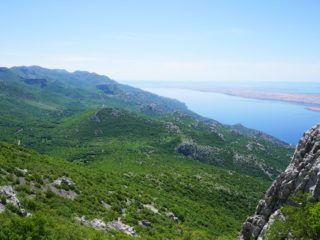
Even though the Shinetsu (or Shin-etsu) Trail uses mountain paths that have been around for centuries, it was only developed as an official trail in 2008. Still, it is probably one of the less busy long-distance trails in the country. This 110-kilometre trail consists of ten sections, leading from the top of Mount Daimyojin, along the Sekida mountain range, to the peak of Mount Naeba. This scenic hiking trail often takes you on sections of ridge walks where the vista stretches out on both sides, offering views of both the Mikuni mountains to the south and the Sea of Japan to the north.
The Preparation
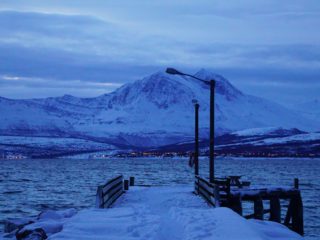
As always, happy trails start with a little preparation. Preparing for the Shinetsu Trail means getting ready for wet, windy weather in spring and autumn, and hot, humid tropical weather in summer. With that being said, let’s get into more detail!
Level of difficulty
At 110 kilometres, the Shinetsu Trail isn’t particularly long when compared to other, more famous trails around the world. If you are a somewhat experienced hiker, this trail shouldn’t take you more than six to seven days. Even for those looking to only walk a few sections, the Shinetsu Trail offers a great way to experience Japan’s natural beauty for hikers short on time.
This doesn’t mean the Shinetsu Trail is an easy trail for those looking to camp and walk it in its entirety; when you’re carrying a large backpack, the trail can be quite demanding in some sections. First of all, the trail is primarily designed for people walking it in daily sections with light daypacks, getting picked up by a hotel shuttle at the end of each day. It features steep, sometimes near-vertical ascents as it attempts to climb every possible hill along its route. Quite often you will encounter trees growing across the trail, forcing you on hands and knees if you’re taller than the average Japanese person.
Second, on the early sections, the campsites are located somewhat inconveniently for those looking to complete the trail in under seven days. Their locations force you to hike for a bit longer on your second and third day to make it to a campsite. This campsite issue can be ignored if you’re carrying a hammock tent, but more on that later. Third, when it rains, the dirt tracks become steep mudslides where you’ll have trouble keeping your footing, especially when carrying a large pack.
All in all, the trail isn’t overly challenging for experienced hikers, but the issues mentioned above should be taken into consideration when attempting a camping thru-hike.
Keep mind that the final section (from Koakasawa to the summit of Mt. Naeba) is significantly more challenging than any of the previous sections. If you’re planning on returning to Koakasawa, it is recommended to leave any excess gear behind to make the 1350-metre climb easier. Good physical fitness and mountain experience are a must!
Logistics
Most locals hiking the Shinetsu Trail walk one section a day while having themselves dropped off and picked up at section trailheads by their hotel shuttle. This means the daily trailheads can be difficult to reach if you don’t have a car to get there. Of course, when you’re walking the Shinetsu Trail in one go you won’t have to bother with daily pickups; you’ll be using campsites and the occasional lodge along the trail.
From Tokyo, the quickest way to get to the Shinetsu Trail is to take a Shinkansen bullet train to Iiyama and take a bus to Madaraokogen in front of the station. A cheaper way would be to take a long-distance bus from Shinjuku Station in Tokyo to Nagano, from where you can take local train services to Iiyama.
There are a number of bus companies operating between Tokyo and Nagano/Iiyama. All of them require you to reserve a ticket online, but not all of them feature English-language websites. Kosokubus.com is one of the fortunate exceptions, and is probably your best bet for a cheap ticket to and from Tokyo!
Public transportation will get you from Iiyama Station to the town of Madaraokogen, from where you can walk to the trail’s start atop Mount Daimyojin. From here on you’ll be mostly on your own, unless you have arranged for a pickup beforehand or are willing to hitchhike your way off-trail. The trail passes the Mori-Miyanohara train station before hitting the final sections, making this a very suitable exit if you plan on walking only part of the Shinetsu Trail.
At the end of the trail, you’ll have to backtrack down the last section to reach Koakasawa. From there, your only option is to take the “Akiyama-go Share Cab” to Midama and connect to bus services from there. Alternatively, you can continue south or east after reaching trail’s end on Mt. Naeba’s summit by following the Akayu or Haraigawa trails, respectively. You can read this official page for more information on exit routes and public transport connections from the Shinetsu Trail.
Food and supplies
You’ll find plenty of options to buy supplies for your Shinetsu hike in the town of Iiyama. Right next to Iiyama Station you’ll find a Tsuruya megastore, where they sell almost anything you need. I recommend buying noodles, (prepared or pickled) vegetables, instant miso, smoked chicken and rice to get you through your daily nutritional needs.
Unfortunately, instant hiking meals are not very common in Japan, so bring them from abroad if you can! In Tokyo, you can try the Montbell stores for outdoor gear and even a small selection of instant meals. In Iiyama Station, there is a Shinetsu information desk where they rent out equipment and sell gas canisters (it is illegal to carry gas canisters or fuel on trains and buses in Japan!).
Resupply options along the first six sections of the Shinetsu Trail are scarce, and will always involve lengthy detours off-trail to nearby villages. It is best to carry all you need from the start! The trail passes through Sakae village after the sixth section, where you can buy limited supplies in local convenience stores.
Looking to save money by camping on your trip to Japan? Check out my post on camping in Japan to learn more about spending your nights in nature while exploring this quirky nation!
The Gear

Gear list
As it cannot be omitted from any hiking guide, here’s a list of must-have gear on the Shinetsu Trail!
I will list only what I consider to be the essentials here; I’ll leave it up to you how much extra gear you want to bring.
- Sturdy hiking boots. Solid hiking shoes are recommended, as most of the trail consists of steep, sometimes slippery tracks.
- Comfortable backpack. The fewer items you bring, the smaller your pack can be. Just make sure to leave enough room for food and water!
- Lightweight tent(when camping). A hammock tent makes finding a suitable place to camp easier.
- Season-appropriate sleeping gear(when camping). A sleeping bag and whatever item you prefer to sleep on. Just make sure to prepare for the season’s nighttime temperatures!
- Season-appropriate clothing. Light and fast-drying in summer, waterproof in spring and autumn.
- Cooking gear and fuel(when camping). Unless you plan on eating cold rations for a few days, bring something to heat up your food or make tea with!
- Water reservoir or water bottle. Either get a lightweight water reservoir for your backpack or a large drinking bottle of at least one litre (33 oz). In summer, temperatures can get quite high, so bring enough! I always bring a lightweight water filter for those occasions where I can’t trust the water quality.
- Map or GPS (and navigational skills). Although the Shinetsu Trail is well-marked, an overview of what’s ahead can come in handy.
- Medkit and basic first-aid skills. As with any multi-day hike, a certain degree of self-reliance is always a good thing. Make sure you bring something to send out emergency signals with as well, just in case.
- Sunscreen. The sun burns hot during Japanese summers!
- Swiss army knife or multitool. Don’t leave home without it.
- A (phone)camera. It would almost be a crime to not make pictures of the beauty of this trail!
- A bear bell (optional). Personally, I didn’t use one as they tend to get pretty annoying. However, making a little noise every now and then is recommendable to scare away any bears!
BEAR SAFETY: There are multiple sightings of Asian black bears each year along the Shinetsu Trail. This species of bear isn’t very aggressive, and will almost always run away at even the slightest hint of approaching humans. Nevertheless, you should take care to never prepare and eat food in or around your tent, never leave food scraps or waste behind and make a little noise while walking, so that you don’t accidentally startle a nearby bear. Clapping your hands every now and then, talking with your hiking buddy or carrying a bear bell will work best.
The Route
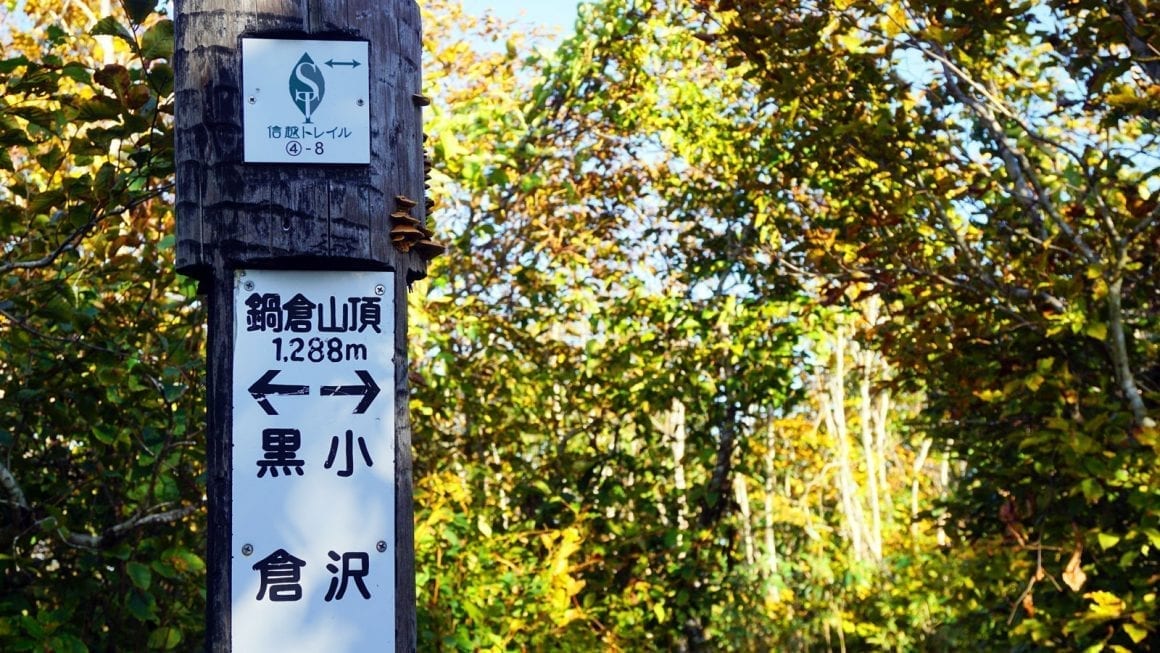
Official trails in Japan are maintained and well-marked. The Shinetsu Trail is no exception, and this makes the use of an official map more of an optional thing than an absolute necessity. You can buy the official 3-part maps at the information centre in Iiyama Station, or check the overview map and download a PDF file on this official page.
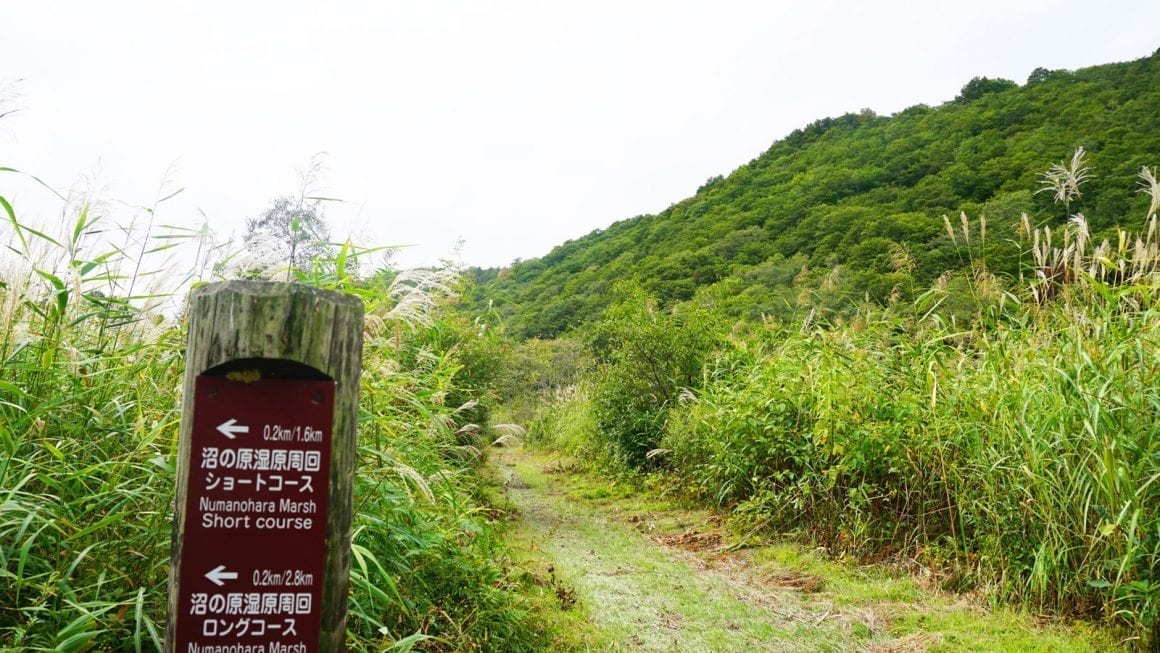
Free information brochures are also in circulation and give basic info on the trail, its sections, the route, location of campsites and other related subjects. These brochures can be found in the Shinetsu information centre in Iiyama Station. These are great information sources for those on a budget, but they’re not to be used as a replacement for an actual map! Good news for those not willing to buy a map: as long as you have at least some basic navigation skills, getting lost on the Shinetsu Trail is almost impossible.
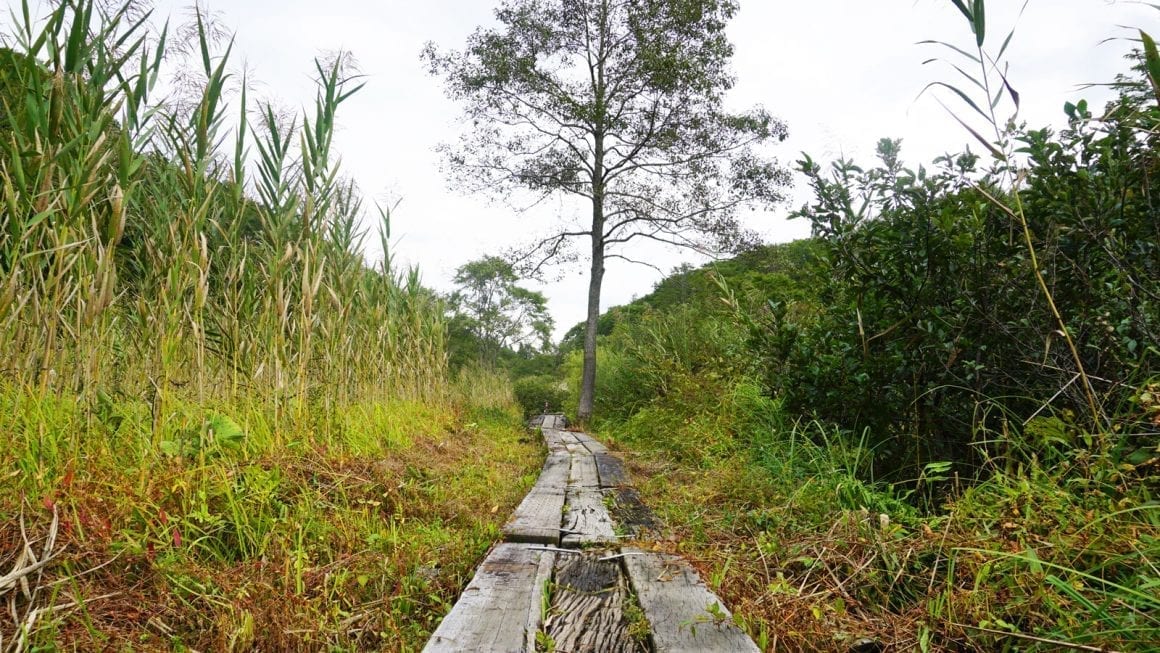
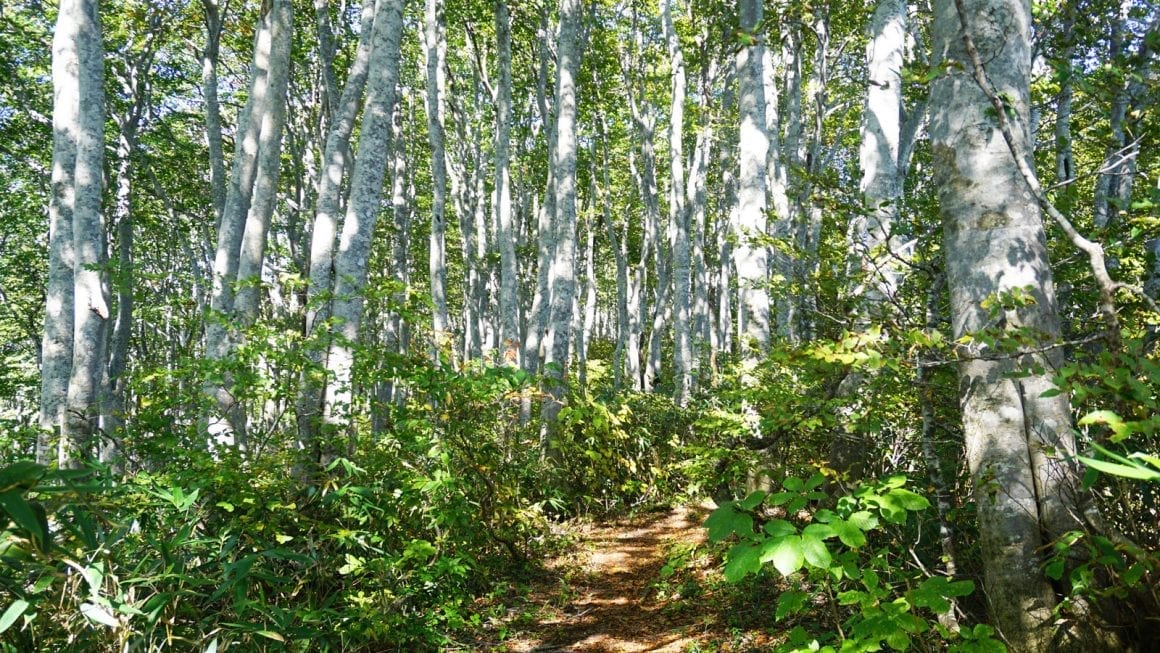
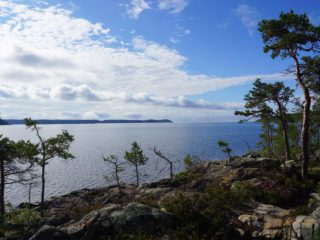
As for the trail itself, it mostly follows the high ridges of the Sekida mountain range between Mount Daimyojin and Mount Amamizu. After these six sections the trail turns south, descends into the valley, and makes its way towards the final climb up Mt. Naeba.

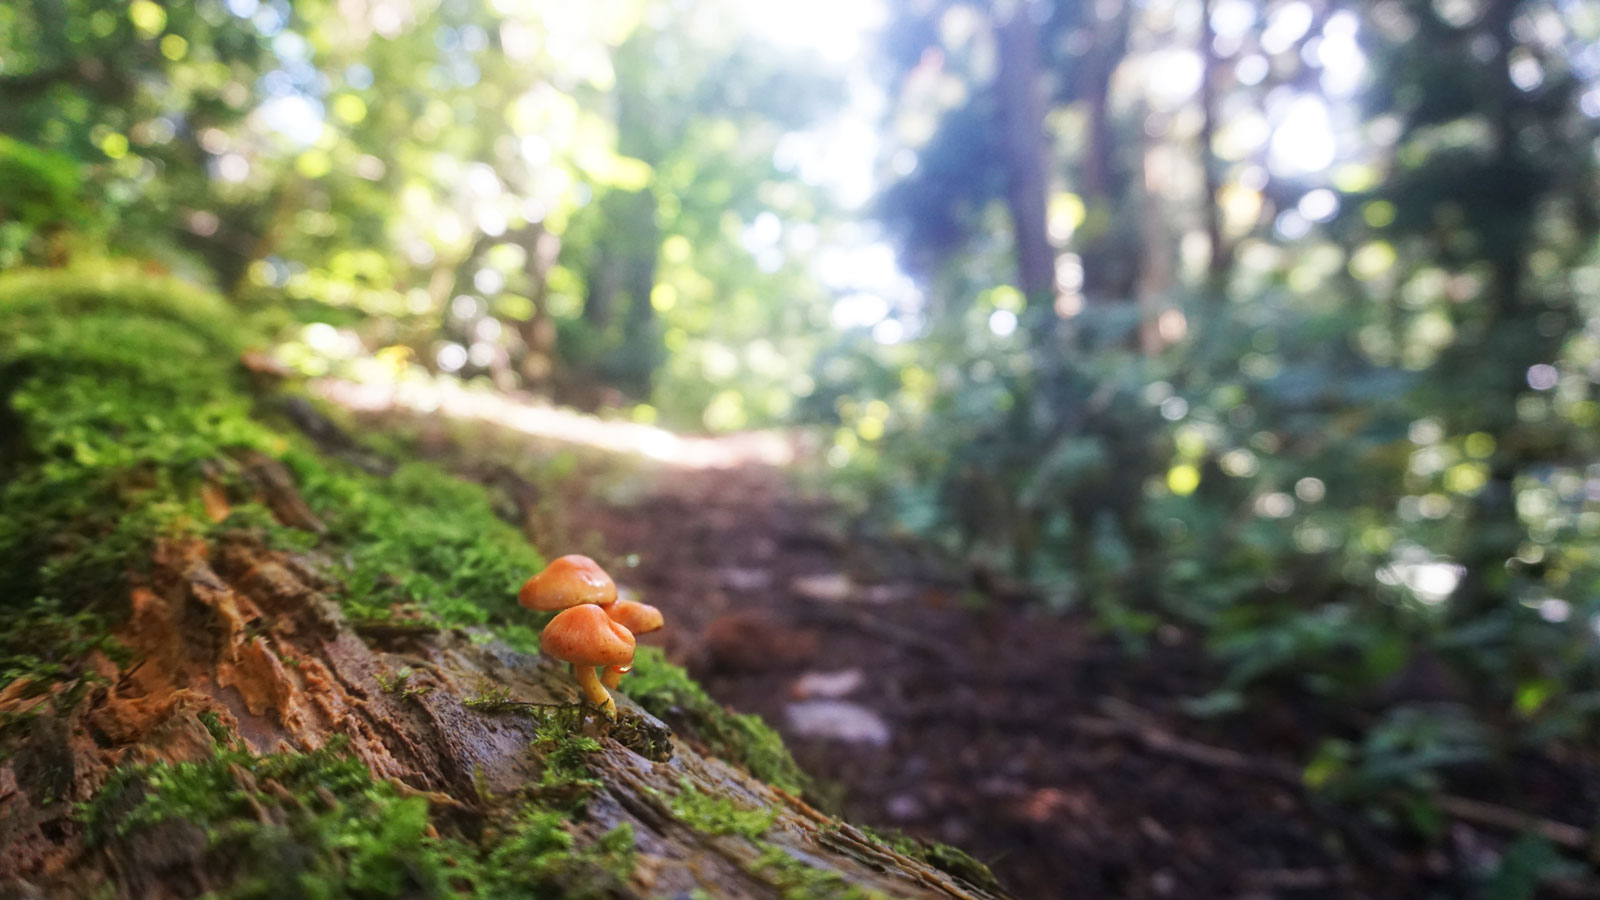
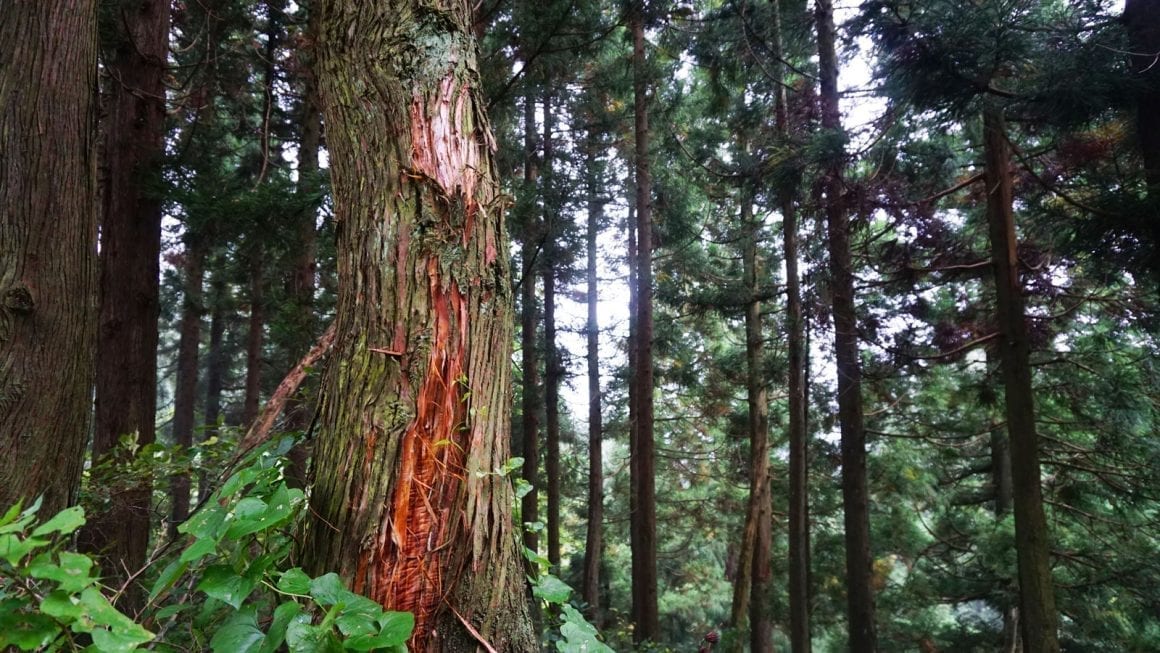
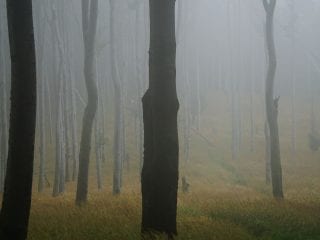
The first sections lead through forest-clad hills, and you won’t encounter the trail’s signature ridge walks until the fourth section. The first three sections can be demanding for those carrying a large backpack in wet conditions; the many steep climbs and descends turn into mudslides during periods of heavy rain. On the later sections, the mountain ridges tend to be more even in terms of elevation, with only a few climbing sections that might prove a little challenging in hot weather.
The last few sections won’t provide much challenge either, until the final section. On this last climb to the summit of Mt. Naeba, you will continuously ascend to an altitude of 2145 metres above sea level. Make sure you’re ready for the climb!
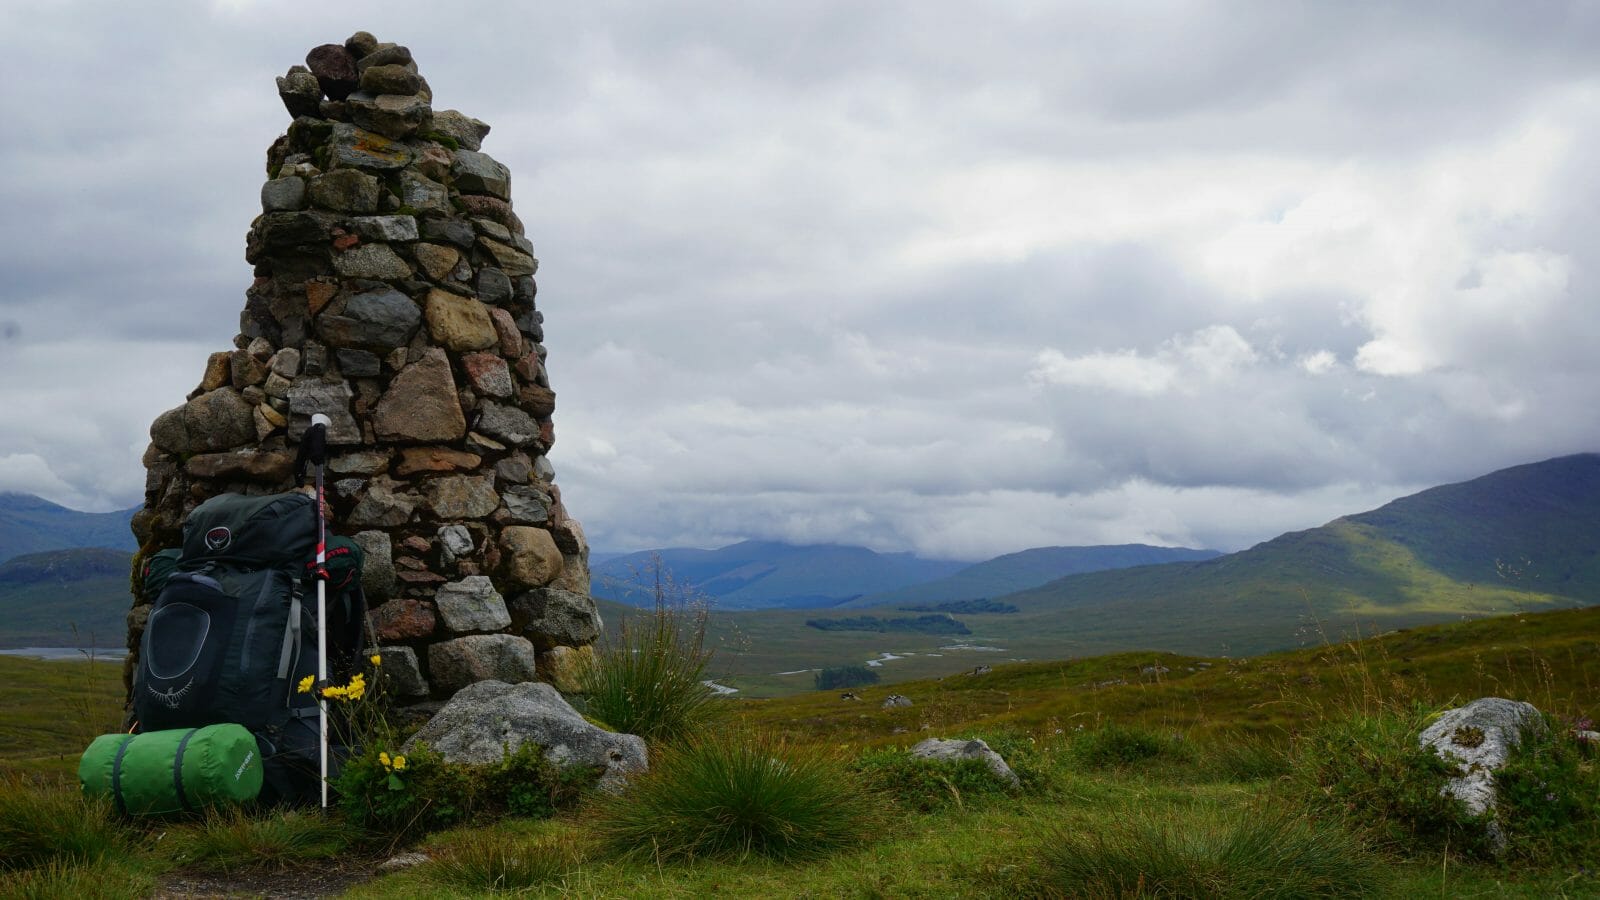
Campsites on the Shinetsu Trail
As mentioned before, the route is divided into ten sections; each section representing an easy day of walking. For those attempting a thru-hike of the trail, there are seven official campsites providing an opportunity for setting up your tent. Unfortunately, the campsite locations do not always match the daily sections everywhere, meaning thru-hikers will face longer days on the trail. Nevertheless, this should not prove too difficult for even moderately experienced hikers.
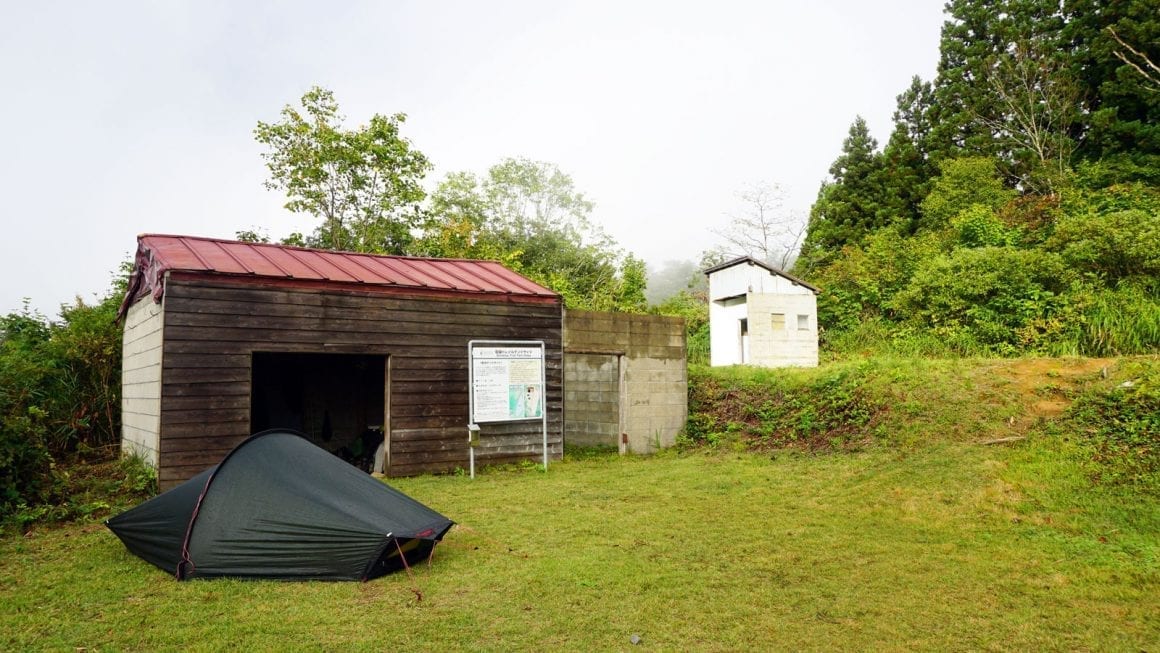
There are seven designated campsites along the Shinetsu Trail:
- Aka Ike Pond Campsite. Situated right along the trail, this campsite is free to use (although a voluntary contribution of 1000 Yen* is still asked).
- Katsura Ike Pond Campsite. Also located right along the trail, this remote, basic campsite sits at roughly 3/4 of section 3 of the trail. You might want to consider passing this site and pushing on to the next one at Togari Onsen, which is larger, better maintained and free of charge. Costs: 1000 Yen* per person, per night.
- Togari Onsen Hoshifuru Campsite. Situated off-trail, it is a 10-15 minute walk from the Hotokegamine trailhead to this campsite. Compared to Katsura Ike, this campsite offers much better facilities. Price: 2000 yen/night for solo campers, otherwise 3000 yen/night.
- Hikarigahara Kogen Campsite. A 15-minute walk from the Shinetsu Trail, this campsite is located close to the Greenpal accommodation, in a park. Costs: 1000 Yen* per person, per night.
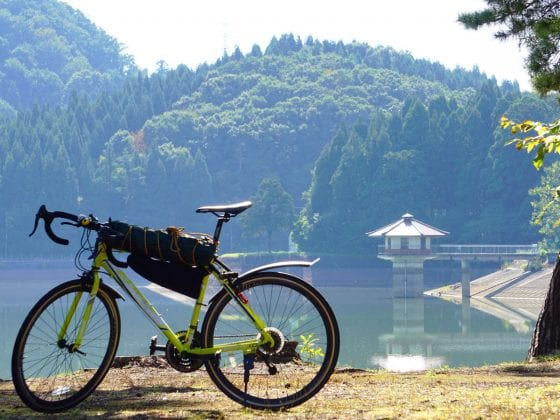
- Nonomi Kogen Campsite. Situated next to Nonomi Lake, this campsite is also a short 10-minute walk away from the trail. Costs: 1000 Yen* per person, per night.
- Daigonji Kogen Campsite. This privately-owned campsite lies to the north of Mount Amamizu, quite a way off-trail. It might be easier to keep going south along the trail to find accommodation at Nakajo Onsen or go wild camping along the trail. Costs: between 1500-2000 yen/night.
- Katakuri no Yado Campsite. Conveniently located in Ketto village, right along the trail. Excellent facilities. Costs: 1500 yen/night.
*price info might be dated, it’s best to consider these prices a minimum. Some remote campsites (Aka Ike/Katsura Ike/Nonomi Kogen) expect you to pay in advance at the trail office or through online reservations. Payment is not strictly enforced at these sites, although camping without payment should be done at your own risk.
Bringing a hammock tent will make camping along the Shinetsu Trail much easier! Avoid camping fees and overgrown rainforests by pitching your hammock between the ever-present trees. Just make sure to keep your food well away from your camp to prevent curious bears from visiting you in the night.
The Cost
Despite Japan’s reputation for being an expensive country, hiking the Shinetsu Trail can be quite a cheap adventure. Most of your spending will be on transportation and accommodation, with food and drinks bought in supermarkets costing about the same as in Western Europe, the USA or Australia.
Getting there
Like I said before, transportation will be one of the biggest drains on your budget. The fastest way from Tokyo to Iiyama would be using the Shinkansen bullet train, a notoriously convenient but relatively expensive way of travel. A one-way trip from Tokyo to Iiyama would cost upwards of 8000 Yen. Of course, it is possible to get a JR Rail Pass that will save you money if you’re planning on using the Shinkansen trains a lot.
A cheaper way would be to take a long-distance bus to Iiyama. This will cost you around 3000 Yen for a one-way trip from Tokyo. Seat reservations must be made online before departure.
As for shorter distances, the local train networks usually offer a cheaper alternative to the expensive Shinkansen train lines. There is a local train line running from Hirataki Station below the end of the Shinetsu Trail to Iiyama Station. A one-way ticket will cost between 500-1000 Yen.
Food and drink
As long as you buy your food supplies from large supermarkets, you can avoid overspending. Those cute family-owned grocery shops should be supported, but they do not always offer the lowest prices or a consistent inventory. Remember that convenience stores like Lawson and 7-11 are convenient, but not exactly cheap.
Expect local food items like rice, noodles and miso to be priced the same compared to local food items in most developed western countries. A 2 kilogram bag of rice will cost between 900-1200 Yen. Four days worth of dried noodles and instant miso soup works great as trail food and will set you back no more than 1300 Yen. Smoked chicken and preserved vegetables can be had for reasonably low prices, too.
Alcohol, local beef, western food items and sliced bread are comparatively more expensive in Japan.

Accommodation
Along with transportation, your daily accommodation will be the largest drain on your budget while in Japan. With hotels and traditional ryokan famously expensive, your best options will be hostels or camping when on a budget.
Most hotels in the area around the Shinetsu Trail will cost between 5000-13000 Yen a night, depending on the season. There are numerous lodgings available in the many ski resorts around the area, though quite a few may be closed in the summer months. Backpacking hostels are scarce, but some lodges sometimes offer dorm rooms. A bed in these dorms will cost you around 3000-4000 Yen a night.
Campsites typically cost anywhere between 500-2000 Yen a night, depending on the type of campsite. Wild camping is generally allowed in Japan, as long as you stay away from private property.
Insurance
I always recommend getting a good travel insurance. Even more so in a country where medical care can get quite expensive, like Japan. As always, I recommend World Nomads for their easy-to-use website and great coverage that includes hiking up to 6000 metres.
Always make sure to thoroughly check your insurance plan, as conditions may vary for your nationality or itinerary.
Note that I do not get anything for promoting them! This is an honest personal recommendation. I just think their insurance plans are perfect for adventurous world travellers like us!
And this concludes my Practical Guide on the Shinetsu Trail. As always, I am available to answer any questions you might have; just send me an email or contact me on social media. Feel free to leave additional tips or questions in the comments below!
See you on the Trail!

4 comments
Roel, like your blog, I’ve been a regular visitor to Japan between 2007 and 2017 . I’ve covered some long distances and just been a cycling tourist. I linked your blog to a Facebook site that I’ve been a member of since its inception(Bicycle Touring, Hiking and Friends in Japan). Covered quite a bit of the regions along the west coast over the years.At first I backpacked around with JR Pass for 3 weeks at a time, then after that it was touring by bicycle from 4 weeks to three months. Covered roughly 25,000+klms .Only prefectures I’ve not seen are Saga and Okinawa.Made a map of places to stay and its proved popular. https://www.google.com/maps/d/viewer?hl=en&mid=1VIUEaa4Vn6B7r3CJliRKM9jn3Ao4Xf9l&ll=35.52207310323992%2C134.37922035&z=5
Hi Paul, thank you for promoting Beat The Trail! Your travel experience in Japan sounds impressive, thanks for sharing your map with us! Maps like these really helped me out when travelling on a budget in Japan. I’ll see if I can link to it in one of my Japan articles.
Hey Roel! Thanks for the writeup. I was curious about your food setup. I’m doing a couple multi-day trips in Japan and got a few questions. Did you bring a 2kg bag of normal rice with you or dehydrated rice? I was worried about bringing rice due to possible fuel consumption. How much fuel did you end up using? Noodles and miso sound great, pickled vegetables also. I don’t eat meat so I’m looking to sub with some dehydrated tofu/olive oil/protein bars. If you have any recommendations of other good backpacking foods you found in Japan I’d love to hear from you. Cheers! I appreciate it!
Hi James,
A I remember, I brought a small bag (not more than a kilo), preserved (pickled) vegetables, soba noodles and miso paste with me, among other food items. If you cook rice with care (stirring often) and use just enough water, you wont waste too much water and fuel.
If you can find it, couscous always works better than rice, just mix it into hot water with some powdered soup for flavour and let it sit off the cooker for a while (add dried veg, mushrooms or anything else to make it more palatable).
One standard sized butane/propane canister should last long enough for this trail.
Have fun with the hike!